Sunday, October 18, 2015

Step Cards for Christmas!

I have been playing around with variations of the step cards I have seen on Pinterest.  I just love all the different things you can do and the dimensionality (is that really a word?) of the cards.

My first attempt uses my much loved Tim Holtz snowman blueprint stamp and die set.    The width of the unfolded side can change depending on what you want to place there.  My folded steps can be embellished with patterned or embossed paper and words that hang over the top of the steps.  For this card I cut the word Believe and the snowflake from my Cricut .


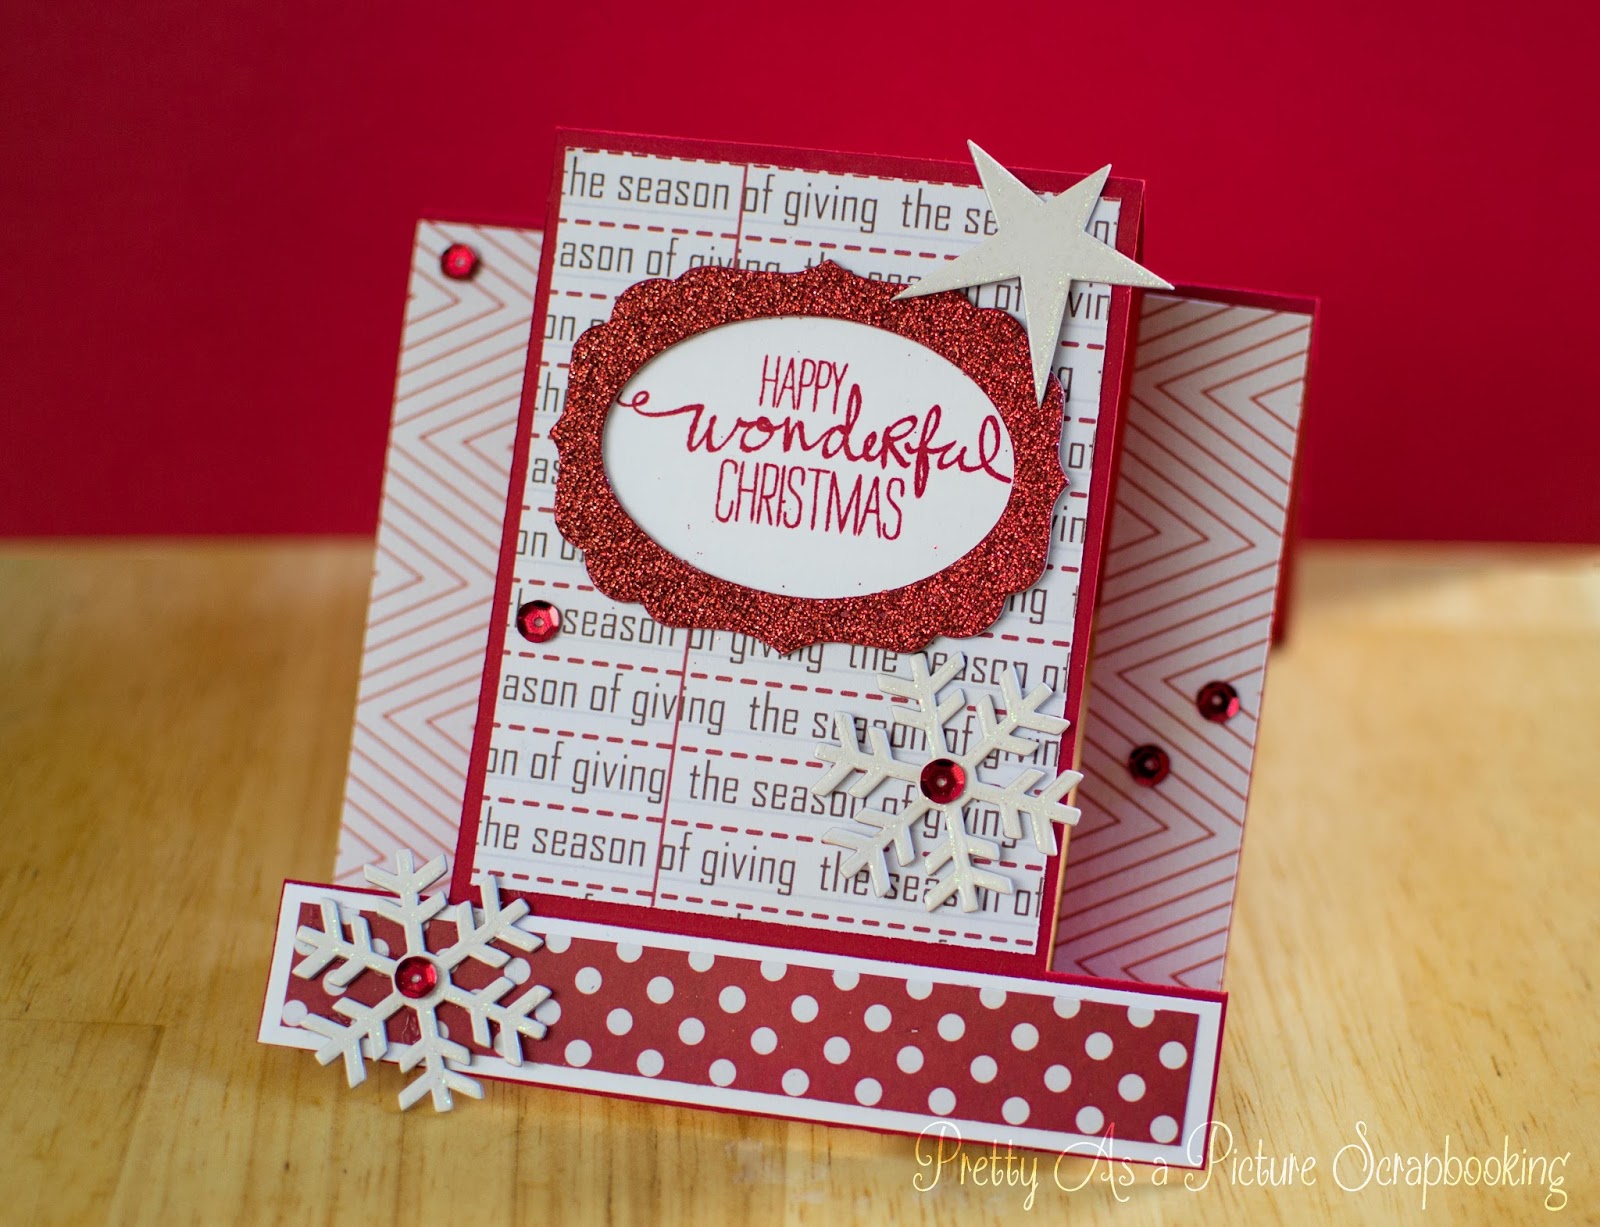
For the next step card I put the unfolded part of the card in the center with narrow steps on either side.  The center holds the main focus which is a Stampin' Up sentiment.  The paper is from Teresa Collins' "Santa's List". The snowflakes and star are chipboard from Little Yellow Bicycle.


On the last step card, I cut the word "Joy" from Stampin' Up's Wonderous Wreath set, out of metallic paper.  The ornament is from Paper Wizard.  The pattern is the same as the first card, I just made the left side of the card a little wider to allow for the ornament to fit.  I used last year's Kaisercraft Yuletide paper as the background.

The side step cards start out with an 8 1/2" x 5 1/2" sheet of card stock.  The width of the unfolded side can change depending on what you want to place there.  If you want the 3 steps on the side  5 scores are needed. The first 2 scores are each 1".  The next one is 1 1/4", then 1" and  2 1/4".  

The taller card is not a standard size.  It started out with a 5 1/4 by 10 1/2 sheet of cardstock.  The diagrams for both are below.  (dotted lines are folds, solid lines are cuts)

Happy Scrapping!


Monday, August 3, 2015

Variations of Sheltering Tree Card

I love the Stampin' Up stamps "Sheltering Tree"  It's such a versatile set, I decided to make 2 cards in the same color scheme with Sheltering Tree.  I could spend weeks making different cards with these stamps.

For the first card I used a separate Thank You stamp. Then I masked it off and stamped the Sheltering Tree over top of the thank you.  Once all the layers of the tree  were stamped, I removed the mask. You can change the shape of the mask to create whatever design you want in the tree.


The next card contains a shaker in the middle of the tree.  For this design I stamped all the layers of the tree onto the card front.  Then cut  a donut out of the tree.  I cut a second circle the same size as the outter circle.  The center of the donut has to be put back into the card by placing it onto the second circle, and then backing it with another piece of white (lining up the tree).

Once that is done place strips of foam adhesive (snipped so it curves) onto the white circle. Back the stamped circle with acetate (I recycle packaging from embellishments). place sequins, microbeads etc into the center of the circle and adhere the stamped circle onto the card, lining up the stamp. Some people prefer to dust the sides of the foam with baby powder to that the sequins or beads don't stick to the  tape.  The finished product makes an adorable shaker card.

I finished this off with a sentiment from the Sheltering Tree set stamped onto a Little B popped up banner.


Happy Scrapping !(and stamping!)

Monday, July 20, 2015

Circle of Spring Wreath


I just love the new Circle of Spring wreath stamp from Stampin' Up.  I'm so happy they made it compatible with the Wondrous Wreath die.  I wish more dies had multiple stamps that would work with them.

I know it's a little early ( or late depending on your outlook)  for an Easter card, but I just couldn't resist creating an Easter card with this set.  I colored the wreath and the extra flowers with water based markers.

Both the wreath and the flowers are popped up with foam dots.

Happy Scrapping!

Saturday, June 27, 2015

Wedding Card


Today I wanted to share a wedding card that I made for a recent wedding I attended.  I felt that it should be something simple yet sophisticated.  I love the gold embossing on white. 

Materials Used:

White cardstock
Gold foil paper
Stampin Up "Congratulations"
Tiffany cake die
white ribbon
dot embossing folder
Gold embossing powder

Monday, April 6, 2015

Easter Eggs Scrapping Style

Coloring Easter eggs has always been a family event,  but this year only 1 of my children was home for Easter.  That left us 18 eggs and not very much time to get them all colored. - Scrapbook supplies to the rescue!  We finished some before going to Easter Vigil Mass, but still had 6 left to color and it was after midnight Saturday night.

For these eggs, after adding some color I used some of my Want 2 Scrap bling on some of the eggs. Just a little piece of bling really really makes the eggs look elegant.  This also allowed me to use up leftover pieces of bling so that nothing goes to waste.


For the next set of eggs we stamped on them using Momento ink and Mama Elephant "Honey Bunny" stamps. Again we colored the eggs first and let them dry a few minutes.  Then, to stamp on the eggs, the clear stamps worked the best without an acrylic block.  This allowed us to bend the stamp to meet the contour of the egg.  The clear stamp also let us realign the stamp if we missed a part. (the bunny's feet didn't show up the first time I tried it, but it was easily remedied.) I think next year we will include more of these in our  eggs in our Easter crafting!

Saturday, January 10, 2015

Valentine's Day Card

I received a Cricut Expression 2 from my wonderful husband for Christmas,  so I have been slowly learning to use Cricut Craft Room (CCR).   I find it somewhat easier to use than my Gypsy, at least as far as welding goes.

Here is my first attempt at designing an overlay.

I used a variety of hearts from different cartridges.  The flourishes are from the Home Accents Cartridge. The hugs & kisses stamp is from Stampin Up Good Greetings Stamp set.  Want2Scrap pearls finish off the card.

Happy scrapping! (and card making)